
The new Dragonflight UI takes flight with the release of the Pre-Patch Part 1 this week. Below you will find the screenshots from the podcast episode 314, What The HUD, along with a brief explanation of each image.
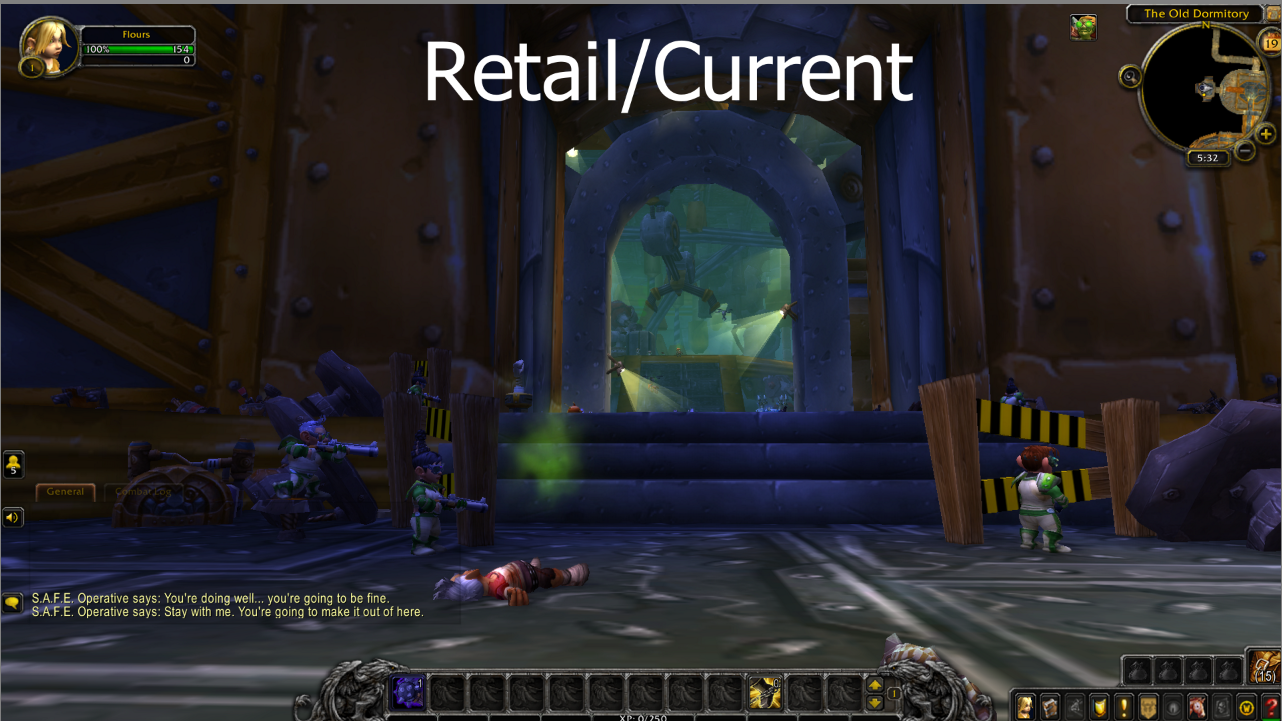
Let’s start off by reminding everyone that when logging in on retail this is what our current default UI looks like provided you are not using any UI Add Ons:
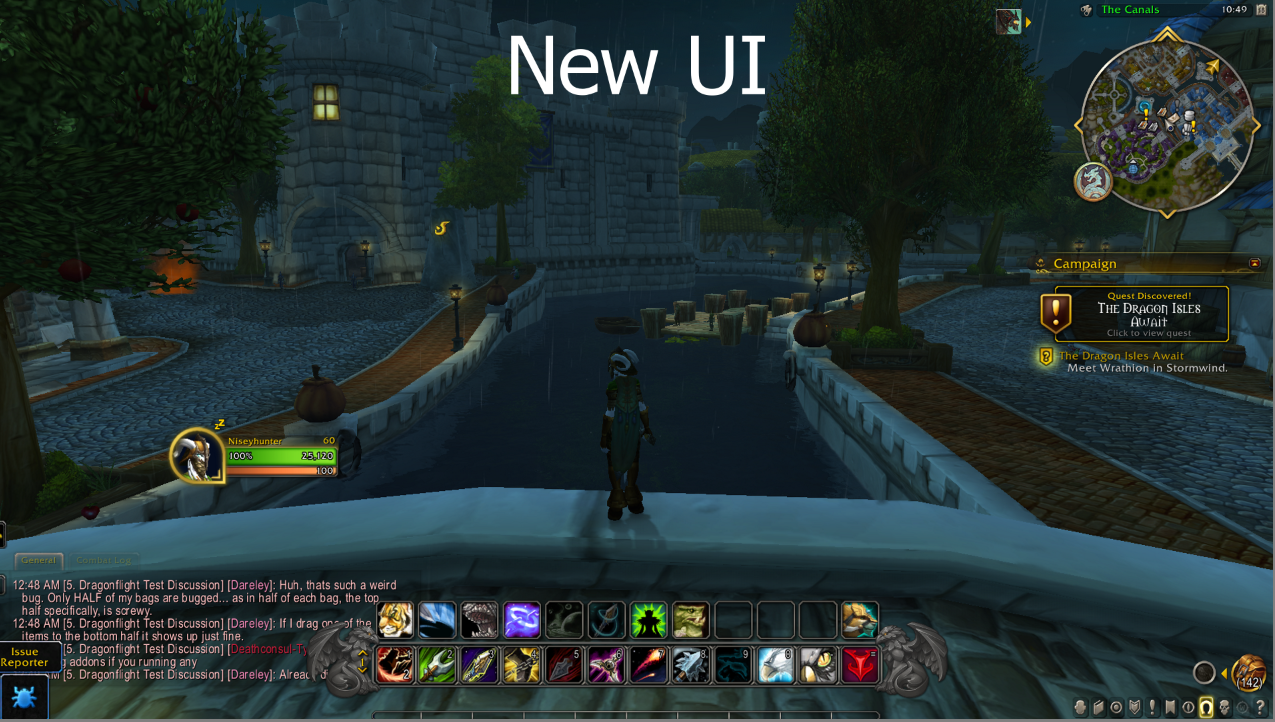
This is what the new default UI will look like upon logging in to Dragonflight. At first glance, things do look a little different and you can see subtle changes here and there:
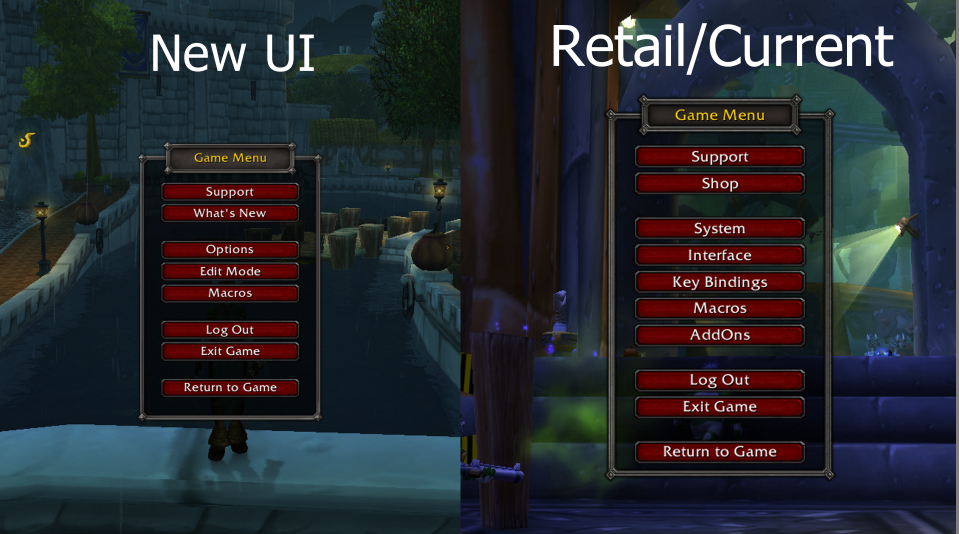
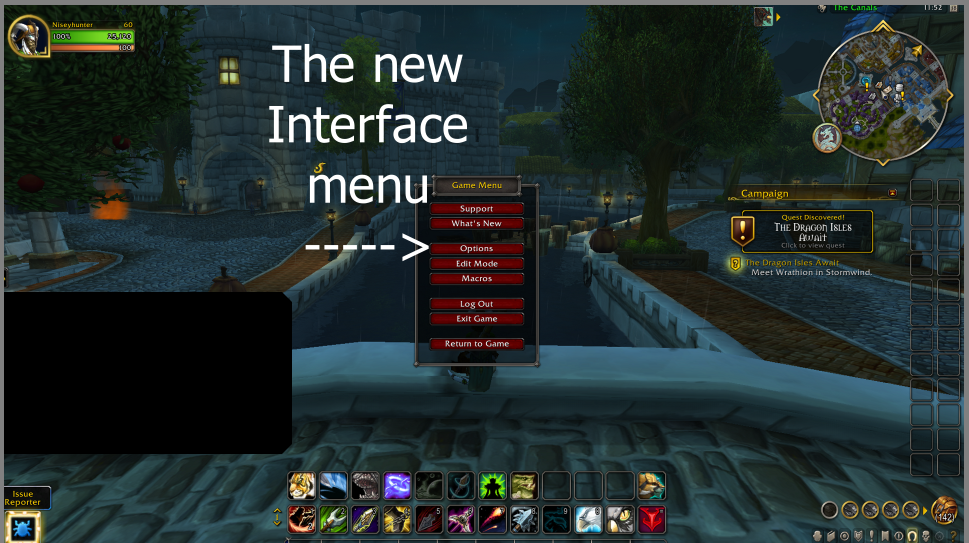
Many of us will go into the Game Menu right after creating our characters to turn on extra Action Bars and adjust what information we want to be displayed. When you open the Game Menu, you will start to see more of the new changes. This is a side-by-side comparison of the new Game Menu and the one currently in use. The new Dragonflight Game Menu is on the LEFT and the current/retail Game Menu is on the RIGHT. You can see there are fewer menus in the new Game Menu, we are not sure if this is a beta thing or not. The two menus here we feel the most attention should be paid to are the Edit Mode menu and the Options menu:
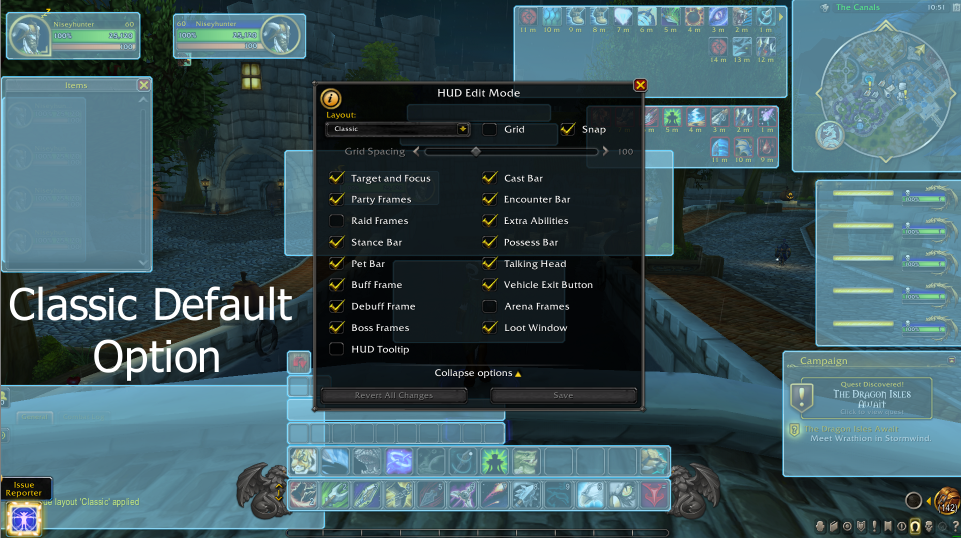
The Edit Mode Menu is what you will click on to set up the new UI. For those of you that use UI Add Ons, this probably is not a big deal. For those of us who do not, all of the available options can be a bit overwhelming at first. The new UI has two base layout options. A Modern one that seems to be the default upon character creation and a Classic option that you can pick from the layout drop-down menu. The difference between the two is the locations where the moveable options start out on your screen:
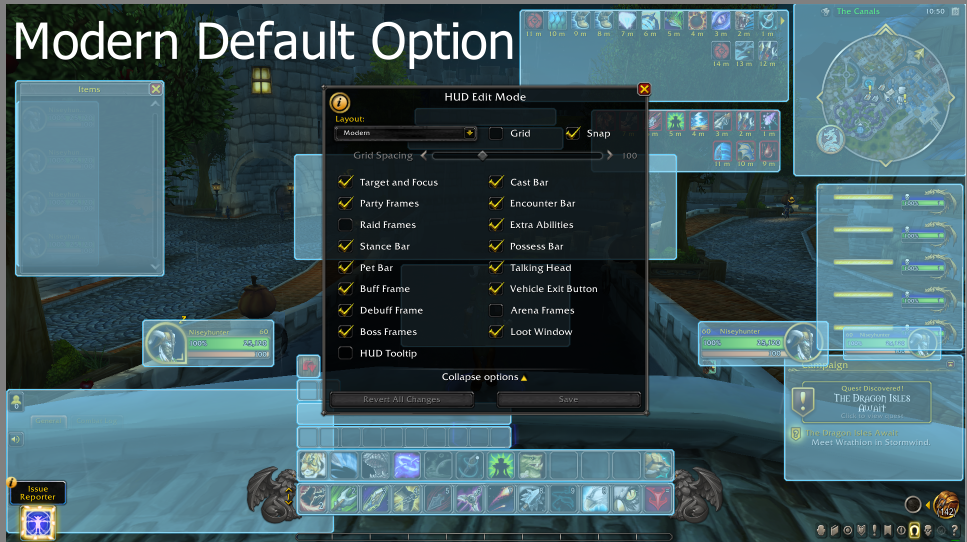
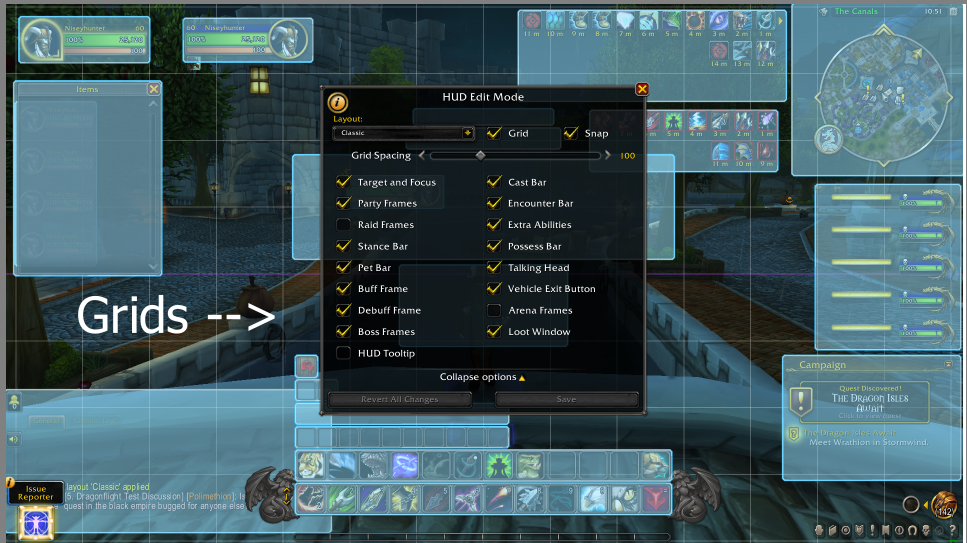
There are also Grid and Snap options you can turn on to help you line things up:
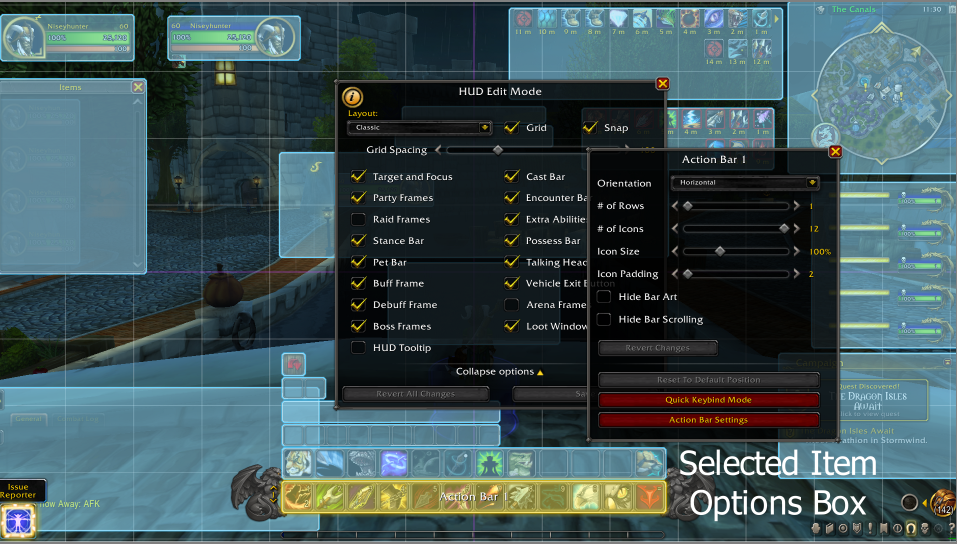
Every highlighted blue box on your screen indicates that the box can be moved or some adjustment can be made to it. Clicking one of those blue boxes will bring up another menu of options specific to that item. For example the Action Bars. When you click on one of those blue boxes you will have this slightly smaller box pop up containing all of the options and adjustments available for them. The Action Bar options box also has a shortcut called Action Bar Settings to take you to the Options Menu in the Game Menu, where you can turn on additional Action Bars if you so wish. This can also be done through the Options Menu itself in case you want to turn any of the extra Action Bars on before you start editing your UI setup:
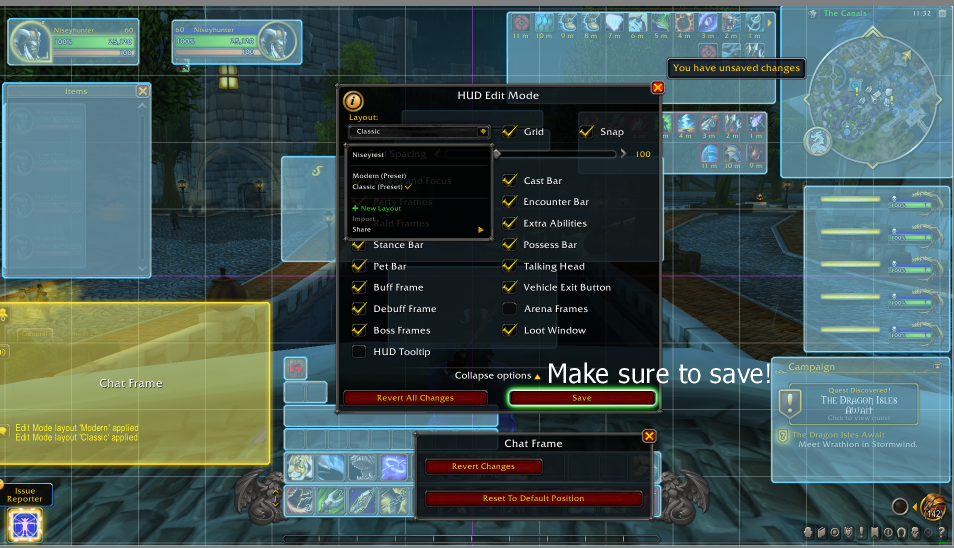
After you have set up your UI make sure you save it. When you go to save it there will be an option box you can check if you only want that specific layout to be used by that character. If you would like your other characters to be able to use that UI setup then simply don’t check the Character Specific Layout box. If you try to close the HUD Edit Mode menu before saving, the Save button will have a green highlight appear around it, and a text box will show up by the X in the upper right-hand corner that says You have unsaved changes:
The HUD Edit Mode menu options box and be collapsed if you are having trouble seeing your screen to move things around. It can also be moved around the screen as well if it is in your way while setting things up:

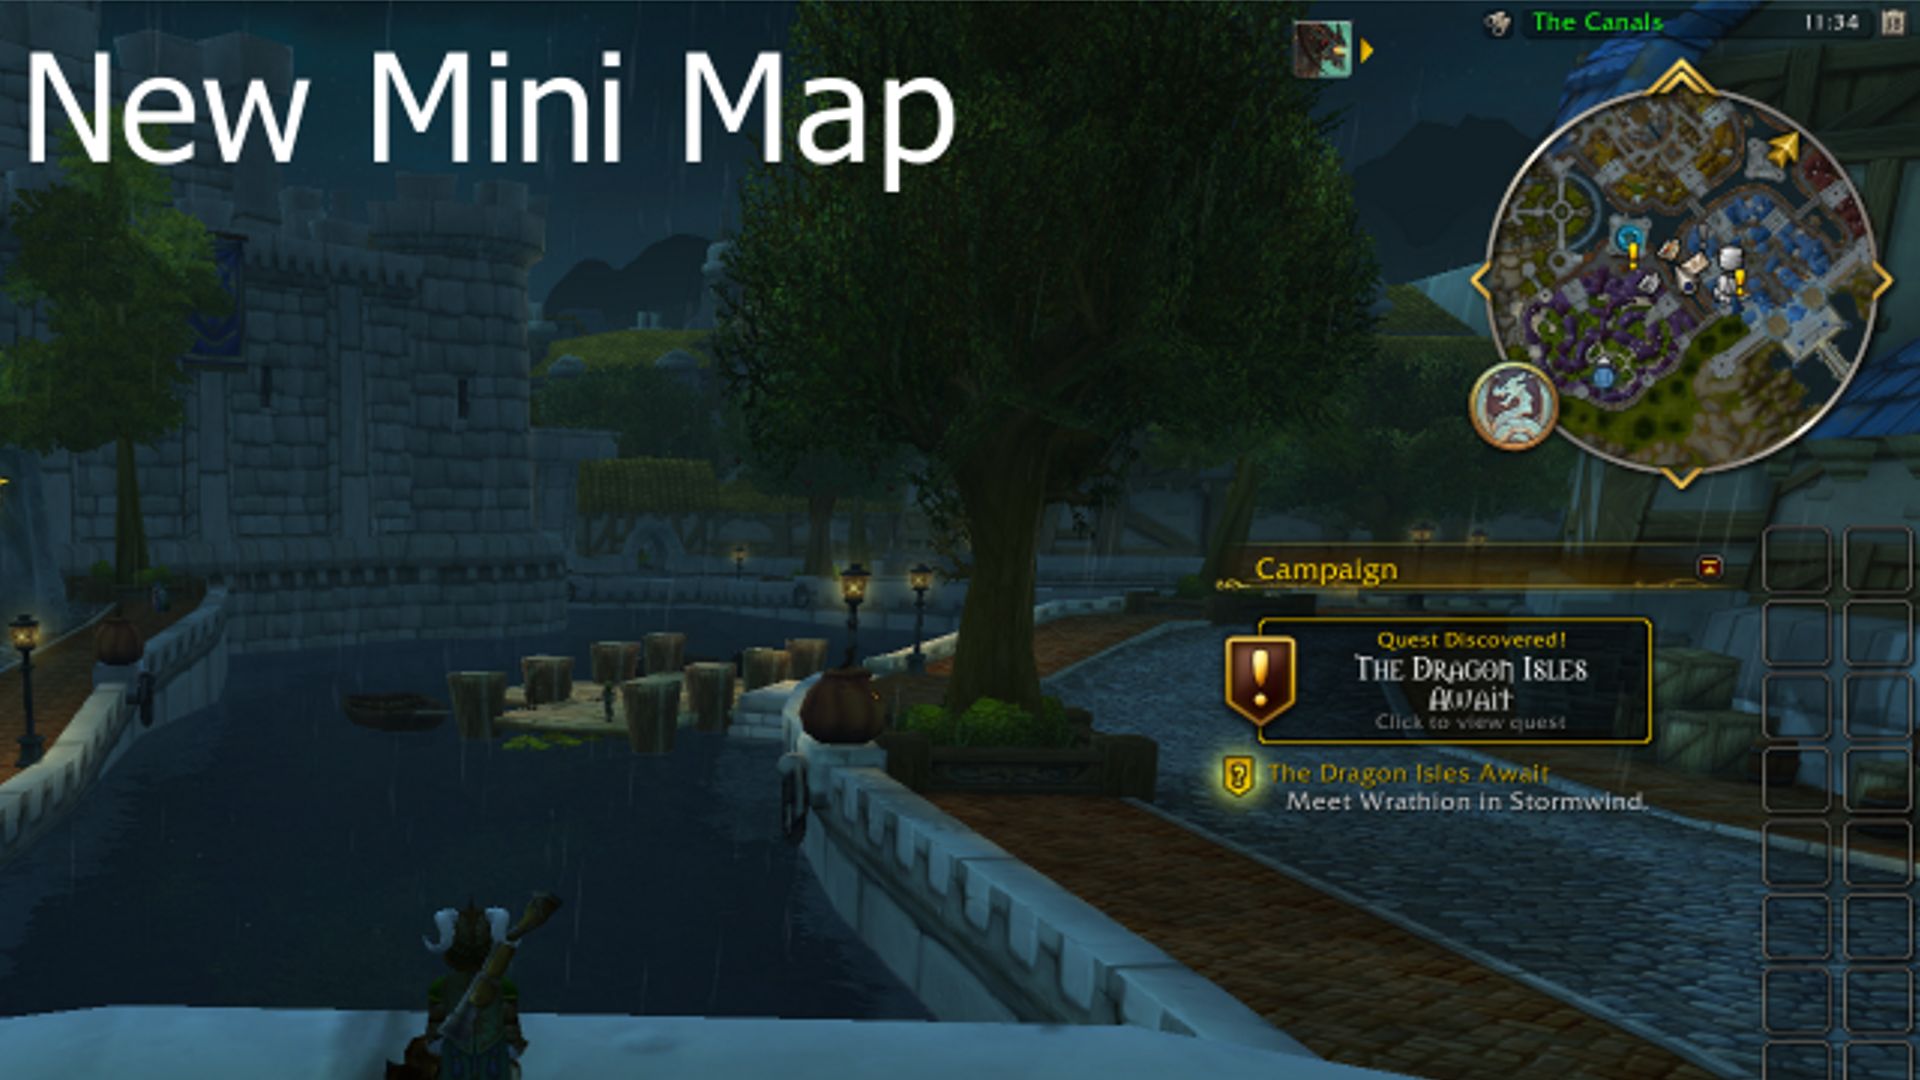
Changes were also made to the Mini Map. While its position can be moved, at this time, there were no options to resize the map or to change the size of the text that says your location. The binoculars on the left side of your location above the Mini Map are what you click to bring up your Mini Map tracking options. The time is located just to the right of your location and the small square on the far left about the Mini Map is what you click to access the in-game calendar:
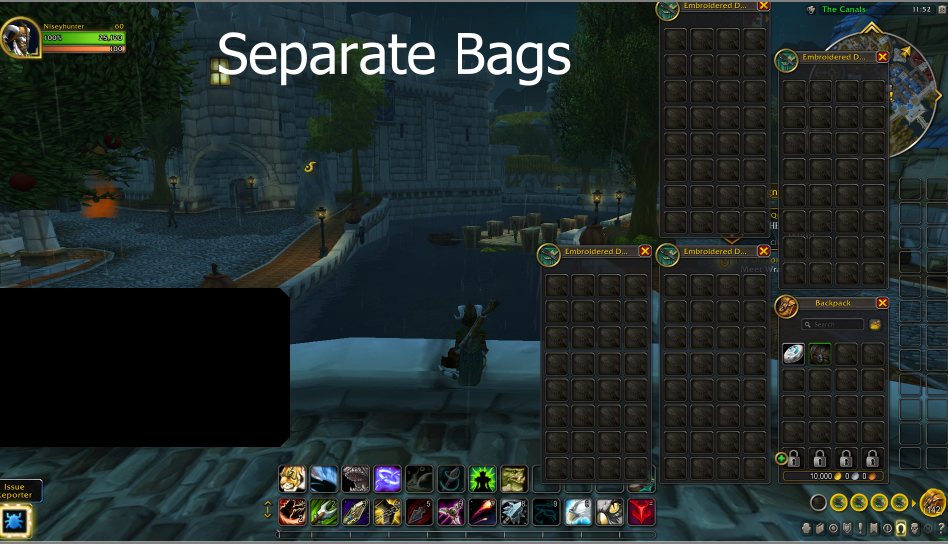
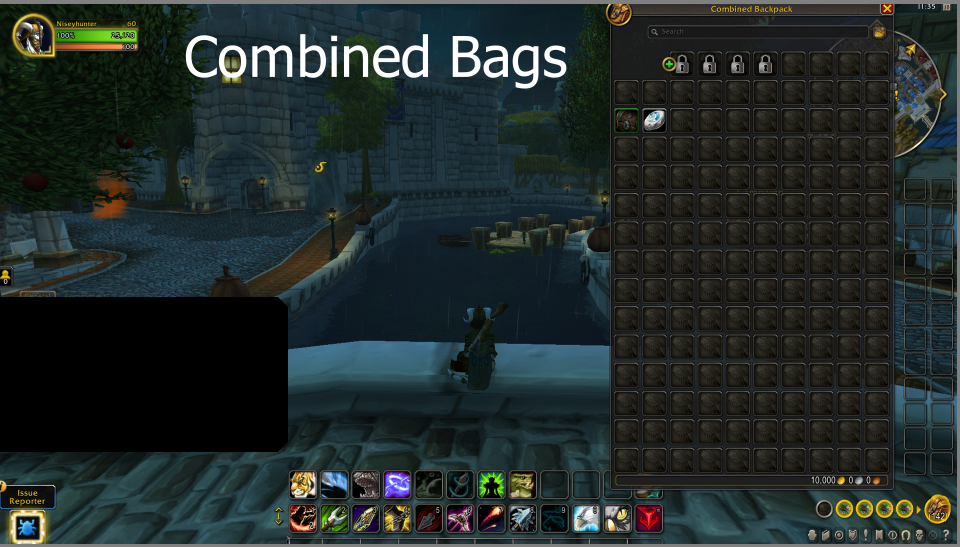
Next up is the bag UI. You can still have five separate bags. Blizzard has brought in a sixth bag slot with Dragonflight specifically for crafting supplies/reagents. That bag is not pictured as I had not come across any yet at the time these screenshots were taken. Blizzard has also made it so we can combine all of the separate bags into one bag without needing an Add On. The combined bag can not be moved around on your screen at this time though. Where it sits is where it stays:
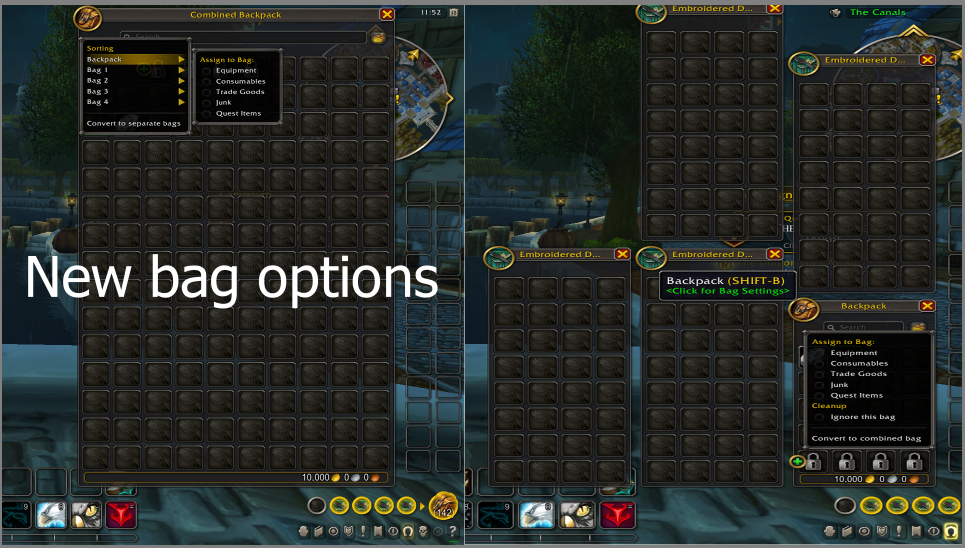
There are also new bag sorting options coming in Dragonflight. Clicking on the bag icon will bring up the sorting options. Here you can pick what items will go in what bags:
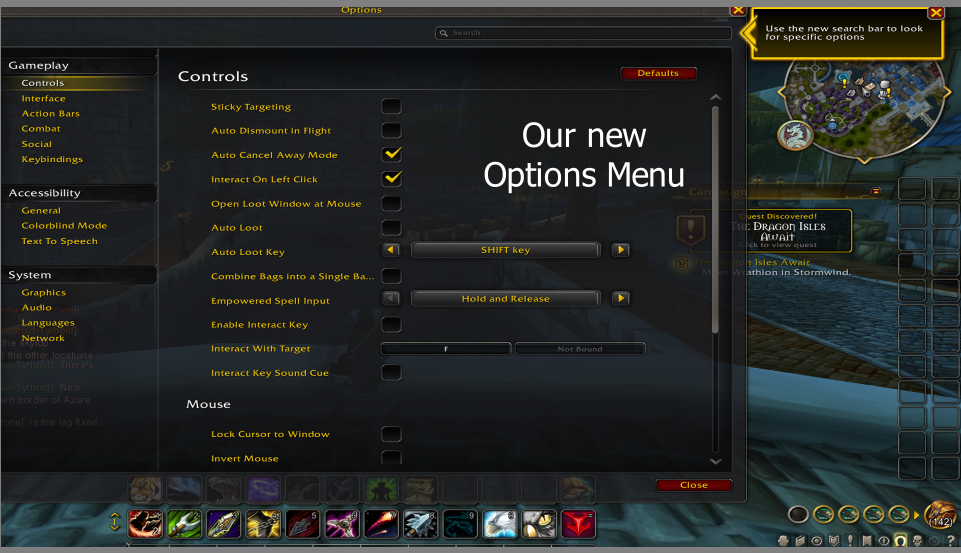
After you have finished setting up your UI and bags, you’ll probably be looking for the Interface Menu to adjust the other information settings to your liking. In Dragonflight, our Interface Menu has now become the Options Menu:
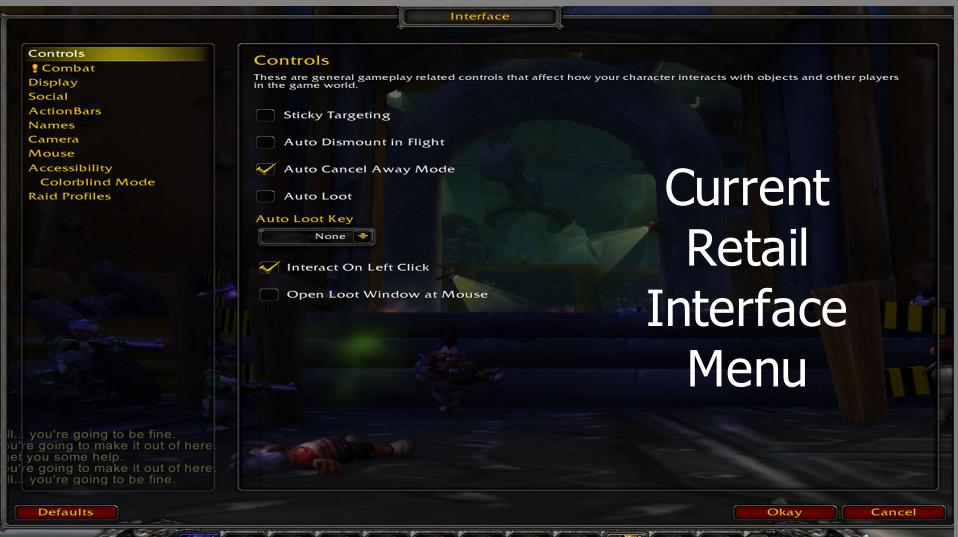
Just to remind everyone this is what our current Interface Menu looks like in retail:
This is what the Dragonflight Options Menu looks like that is replacing the Interface Menu. One of the new features that have been added is a search bar to help you find what you are looking for faster:
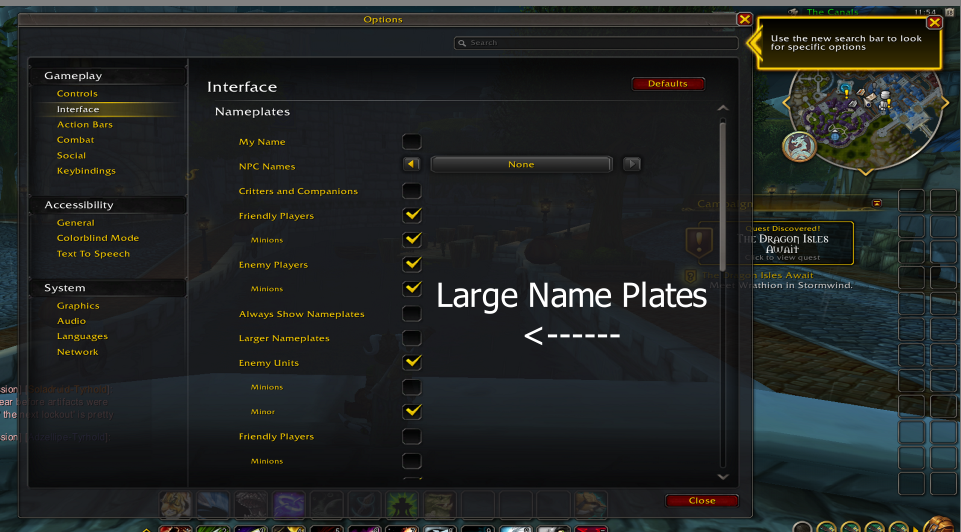
The Interface tab is now going to have all of your nameplate options, including the Larger Nameplates option for those that use it:
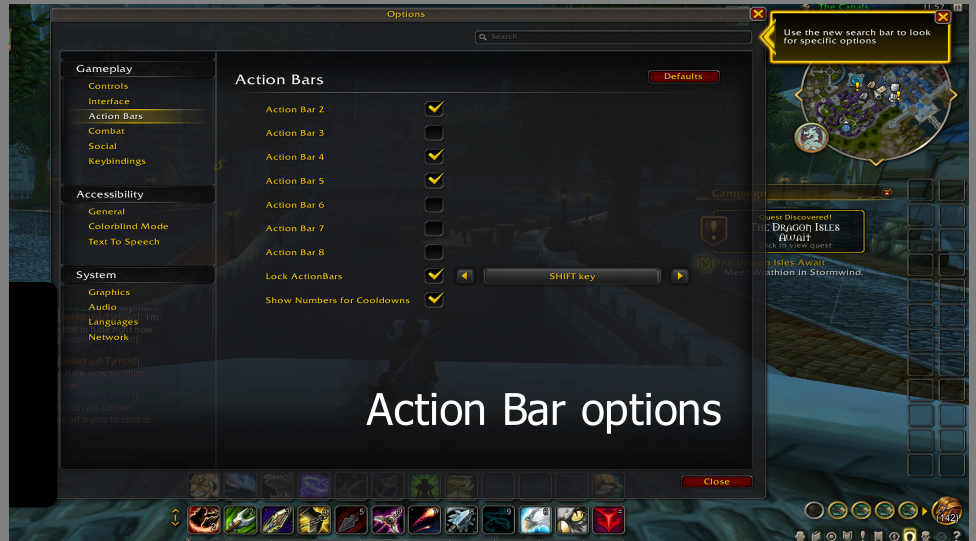
The Action Bar tab is next. This is pretty self-explanatory:
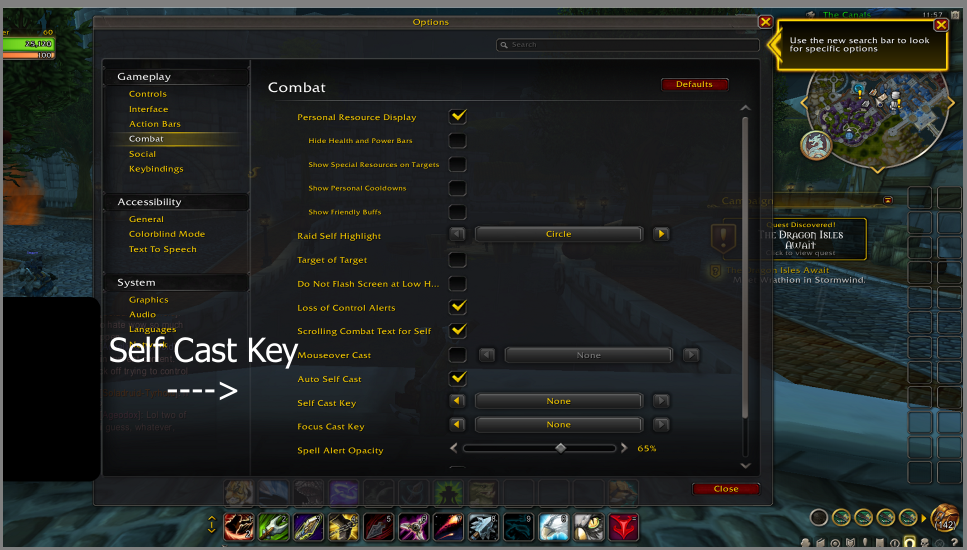
The Combat tab is where you’ll find your Self Casting options and Scrolling Combat Text among other things:
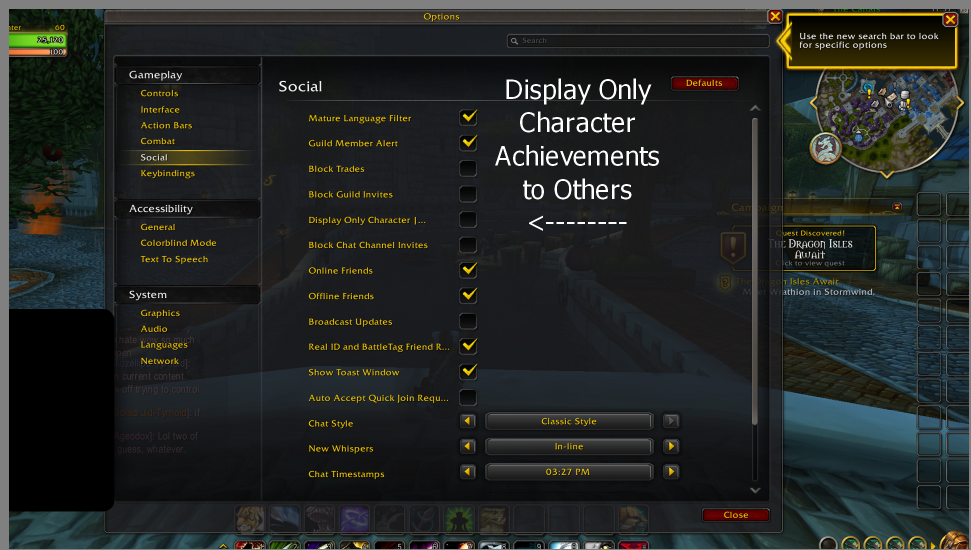
The Social tab is where you will find your guild member alerts and trade options. You can also link your Twitter to post screenshots to your Twitter account directly from the game as well. The most important option on this tab for us is going to be the Display Only Character Achievements to Others box. You’ll have to check this before you can add your character to the website’s trackers. If you don’t check this box, you will get a message about having killed raid bosses or having done pet battles:
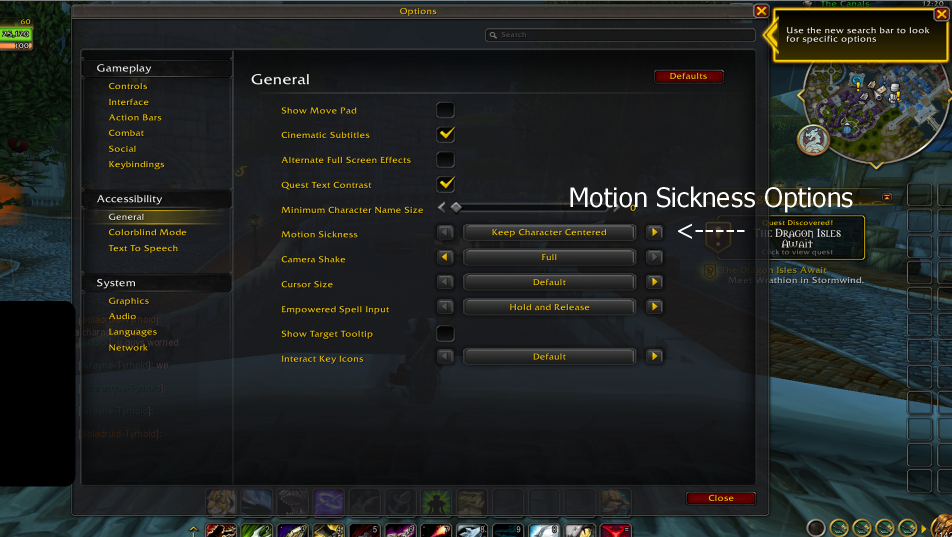
Next on the list are the Accessibility options. The General tab here is where you will find things like Quest Text Contrast and your Motion Sickness options. We’ve been hearing some people are having a few issues with dragon riding so might be good to know where this option is located:
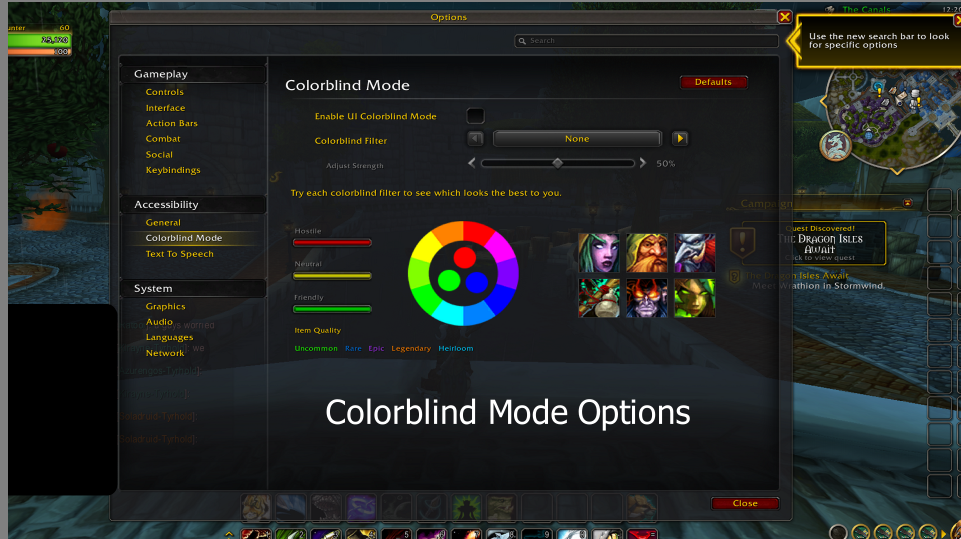
The Colorblind Mode tab is next. This one is self-explanatory:
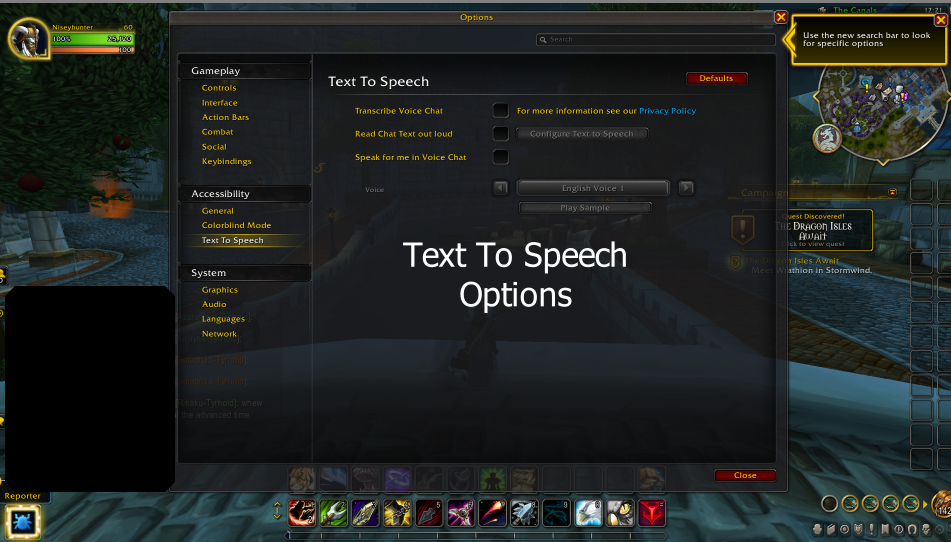
The last tab in this section is the Text to Speech options tab. The System options section we’ll leave for you to explore on your own, as those will be more personally focused based on your gaming rig, preferred languages, and network setup:
Header image by Conny Schneider on Unsplash.